Wi-Fi QR Code for Events: Easy Guest Network Setup
Learn how to set up Wi-Fi QR codes for events, workshops, and conferences, from creating a guest network to testing, displaying, and retiring it after the event.
There’s a moment at almost every event when someone asks the same question: “What’s the Wi-Fi password?”
- Event Wi-Fi Has a Different Problem
- Start With a Guest Network, Not Your Main Network
- Give the Event Wi-Fi Its Own Identity
- Put the QR Code Into the Event Journey
- A Password on a Slide Isn't Always Enough
- Don't Print 500 Copies Before Testing One
- Make the Connection Obvious
- What Happens When the Event Is Over?
- A Simple Event Wi-Fi Workflow
- The Best Event Wi-Fi Is the Part Nobody Talks About
One person asking is no big deal. Ten people asking within five minutes is annoying. Fifty people asking while your registration team is trying to check badges, answer questions, and keep the event moving? Now you have a small operational problem.
That’s why event Wi-Fi deserves a little more planning than simply writing a password on a piece of paper. A QR code can make the connection process much smoother, but the real trick is building the whole setup around the way people actually arrive, connect, use the network, and leave.
Event Wi-Fi Has a Different Problem
Home Wi-Fi and event Wi-Fi may use the same basic technology, but the user experience is completely different.
At home, you might connect a few phones, laptops, TVs, and smart devices. Everyone already knows which network belongs to the house, and someone can usually help if something goes wrong.
An event is the opposite. You may have dozens or hundreds of people arriving within a short window. Most of them have never connected to your network before. Some may only stay for a couple of hours. Others may be standing in a crowded registration area with one hand holding a phone and the other holding a coffee, badge, or event program.
The goal, therefore, isn't simply to have working Wi-Fi. The goal is to make Wi-Fi access disappear into the background.
People should be able to recognize the right network, scan the QR code, connect, and get on with whatever they actually came to the event to do.
Start With a Guest Network, Not Your Main Network
Before creating any QR code, decide which network your attendees should actually use.
If your venue has a network used by employees, organizers, production equipment, payment systems, or other internal operations, don't treat that network as the default connection for guests just because it already exists.
A dedicated guest network creates a much cleaner setup. Attendees get Internet access without being directed toward a network intended for internal use, while the event team can manage the visitor connection separately.
This distinction becomes even more important at larger events. The Wi-Fi used by the registration desk doesn't necessarily need to be the same Wi-Fi used by attendees. Likewise, equipment handling presentations, streaming, ticketing, or other event operations may have completely different requirements.
The QR code should point people toward the network they are supposed to use—not whichever network happens to be easiest to share.
Give the Event Wi-Fi Its Own Identity
Here's a surprisingly simple improvement: make the network recognizable.
Compare these two names:
NETGEAR_5G_8291
and
DesignWeek_Guest
The second one immediately tells an attendee, “Yep, that's probably mine.”
A recognizable SSID can save people from standing around comparing multiple networks with similar names. This matters particularly at venues where several businesses, meeting rooms, exhibitors, or neighboring offices may have visible Wi-Fi networks.
The name doesn't need to be clever. It just needs to be obvious.
If the event is called Tech Meetup 2026, something like TechMeet2026_Guest gives attendees a useful visual confirmation before they even connect.
That tiny bit of clarity can remove an entire layer of hesitation.
Put the QR Code Into the Event Journey
Don't think of the QR code as a poster. Think of it as part of the attendee journey.
Someone might need Wi-Fi before the event even starts. They may want to check the schedule, open a digital ticket, message a colleague, or download presentation material while waiting in line.
At check-in, the QR code could appear on a small sign at the registration desk. Once inside, it might appear on a welcome screen or table card. During a presentation, it could even be displayed briefly on a screen alongside other practical event information.
The important question isn't “Where can we put another QR code?”
It's:
“When is someone most likely to need Wi-Fi?”
That shift in thinking makes placement much more useful.
You don't need to cover every wall with QR codes. You need to put the connection option where people naturally look when they need it.
A Password on a Slide Isn't Always Enough
Imagine a presentation screen showing:
Wi-Fi: EventGuest
Password: X7h29Lm82Q
Someone sitting near the back has to read the password, remember it, open Wi-Fi settings, find the network, type the password, and hope they didn't confuse a lowercase “l” with the number “1”.
That's a lot of work for something that should take seconds.
A Wi-Fi QR code turns those credentials into a much more direct action. Instead of manually transcribing a password, attendees can scan the code with their phone and let the device handle the connection details.
If you're preparing one for an event, a free wifi qr code can be used as the simple connection layer between your guest network and the people attending.
The important word here is layer. The QR code doesn't replace the network configuration. It simply makes the information already required for the connection easier for a person to use.
Don't Print 500 Copies Before Testing One
This is where event preparation can get hilariously backwards.
A team spends time designing a beautiful sign, sends it to print, distributes hundreds of copies around the venue—and only then discovers that the QR code doesn't work as expected.
Don't do that.
Create one master version first. Test it on the actual devices your attendees are likely to use. Then test the printed version, not just the image on your computer screen.
A QR code that looks perfect on a monitor can behave differently when it's printed too small, placed behind reflective plastic, or viewed under poor lighting.
Also test it from the approximate distance where people will actually scan it. A QR code sitting three feet away on a registration desk has different requirements from one displayed on a large screen across a conference room.
Once the master version passes the real-world test, then replicate it.
Create → Test → Approve → Print → Deploy
That order can save a surprisingly large amount of event-day frustration.
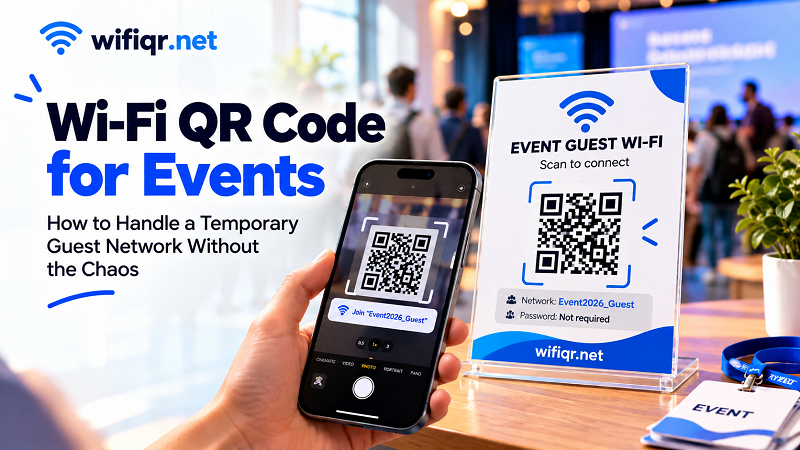
Make the Connection Obvious
The best event signage doesn't require a tutorial.
Something as simple as:
EVENT GUEST WI-FI
Scan to connect
followed by the QR code and network name can be enough.
If people need additional information, keep it short. You don't want attendees reading a paragraph of instructions while a queue forms behind them.
There is also value in showing the network name next to the QR code. It gives users a quick confirmation that they're connecting to the intended guest network.
For attendees who cannot scan the code, displaying the SSID and password somewhere nearby can provide a manual fallback.
The idea isn't to make the sign more complicated. It's to give people a clear primary route and a simple backup.
What Happens When the Event Is Over?
This is the part that often gets forgotten.
An event may finish at 6 PM, but the Wi-Fi QR codes don't magically disappear at 6:01.
If the guest network was created specifically for a temporary event, decide what happens to it afterward. You might disable the network, change its credentials, or repurpose it for another use.
If the credentials change, old printed QR codes should no longer be treated as valid connection instructions. That's especially important if signs, slides, social posts, or printed materials are still circulating after the event.
In other words, the event has an end date. Your Wi-Fi access setup should have one too.
Take down temporary signs. Remove outdated digital materials. Update credentials when appropriate. And don't leave an old event QR code sitting on a reception desk for the next six months.
A Simple Event Wi-Fi Workflow
The entire process can be surprisingly straightforward when you treat it as a sequence rather than a last-minute task.
1. Create the guest network. Decide which connection attendees should use.
2. Set the event credentials. Give the network a recognizable name and appropriate access details.
3. Generate the QR code. Encode the connection information into the code.
4. Test the real thing. Try different phones and the actual printed or displayed version.
5. Add it to the attendee journey. Put it where people are likely to need Wi-Fi.
6. Let attendees self-connect. Your registration team shouldn't have to repeat the same password all afternoon.
7. Retire the setup. When the event ends, remove or update temporary access and signage.
That's the whole playbook. Nothing fancy. Just a little preparation in the right order.
The Best Event Wi-Fi Is the Part Nobody Talks About
Nobody attends a workshop because they are excited to configure Wi-Fi.
They want to find their seat, download the agenda, post a photo, open a presentation, message a colleague, or get on with the event.
That's why good Wi-Fi onboarding feels almost invisible. There is no long explanation, no staff member repeatedly spelling out a password, and no crowd gathered around a tiny sign trying to figure out which network is theirs.
They see the connection option. They scan. They join.
Then they move on.
And honestly, that's exactly how event Wi-Fi should work.